Many photographers can´t decide which filter they should build into their modified IR-DSLR camera. If they take one with a longer cut wavelength (e.g. 850 nm) the IR-effect will be better, but they can't use that filter for color infrared photography.
If they take a filter closer to the visible spectra, they may lose the opportunity to take more dramatic pictures.
Some photographers aren´t sure, that they want to modify their camera at all. Perhaps it is the backup camera, and with an IR-filter buildt in, the camera is not a real backup for a normal camera. Or they can only afford to take / carry one DSLR into holiday.
It is the same with me, I have a Canon EOS 350D / Rebel XT, and a 5D. And I thought about IR-photography. The work with filters in front of the lens was not that good, the exposure times of about 30 seconds are too long for experiments. And with a small child to carry, one is happy to go out without a tripod. Furthermore I was not happy with all that filter changing - I lost my first 1000x greyfilter to a wild river.
My first step was to place a Kodak Wratten 87 foil filter in front of the shutter!
This caused a small defocus, and I had some problems with marks in the gelantine.
And the long exposure times were the same - which I knew beforehand.
But the further steps were already planned.
The next step was to remove the original IR-Cut filter which is located inside the camera between shutter and sensor.
For this I used the good descriptions from Ashley Roeckelein and Lifepixel.
But I put no new filter instead of that removed IR-Cut inside the camera!
By the way: The original IR-Cut filter measures 28.02 x 22.07 x 2.46 mm at my camera.
The third step were some tests with that Kodak Wratten thin foil filter. It worked, but the focussing was a problem.
The fourth step - this is my new way to use the same DSLR camera with different filters: I put the glass filters directly in front of the shutter!
If I grind the filters into the correct shape, I have the option of using with one IR camera different filters for different photographic tasks:
I could use (if I had all)
- the removed original filter with a bit of modification for normal visible work (done)
- a deep IR filter like the 830 nm filter for black and white IR photography (done)
- a 665, 695 or 715 nm filter for colour IR photography (done)
- a UV-pass, visible block, for ultraviolett photography
- a clear glas for the whole spectrum the camera can see (done)
- a Red filter like the Rodenstock 29 (done)
- a special astronomic filter
- a 1000x grey filter for extremely long exposure times (done)
- a 8x grey filter for work with lenses @ 1.4 or 2.0 with studio flashes in a small home studio
The last two options with the grey filter might be difficult with the IR light in the illumination light, probably some kind of IR-Cut (Schneider Kreuznach 486) in front of the lens or in front of the mirror (with focus shift) is needed.
All the options result in working with a bright viewfinder - no need to remove the filter for composing the image. You insert the needed filter for the kind of photographic work you want to do and go out for the photographic trip. In case the subjects found are better captured with an other filter you can carry the filters along and exchange them easily. If the filters are prepared, I need less than one minute for the exchange of the filters.
The AF of the camera is gone - the AF submirror stays in the wrong place for his work. This didn't trouble me, because I work mainly with manual lenses.
Recently I have modified the B&W 093 filter for my EOS 350D / Rebel XT - it works very well. The filter is 2.3 mm thick, so the focus shift is minimal. The IR-mark on the distance ring of the lenses is ok.
As you can see here, the quality of my glass-work is not that professional - but there are no dents or so visible in the pictures:
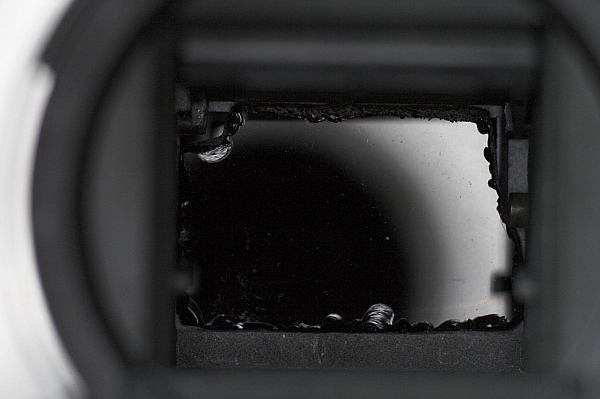
The filter is located in a hollow in front of the shutter. The mirror joint is on the same level, so I had to grind the filter to fit it in. I did the grinding that narrowly, that the filter stays in place alone due to the friction - mostly. If I had more problems with that, I would have to attach some kind of spring, or simply a piece of tape.
During this work, and all the changing of the filters, I touched the shutter more than 100 times with the glas - but still it works without problems.
The original IR-Cut filter that was in the camera was not easy to grind down. One of the inner layers broke. I went on with the grinding, to make some tests with that filter, even though it was broken. To my utter disbelief I could not see any difference to my normal unmodified camera in the picture - but I have to do some further testing to verify that. Below you can see the broken filter:

Now I have seen the difference: When I use a microscop lens (10x) on that camera with that broken original filter I see clearly the structure of the cracks in the image.
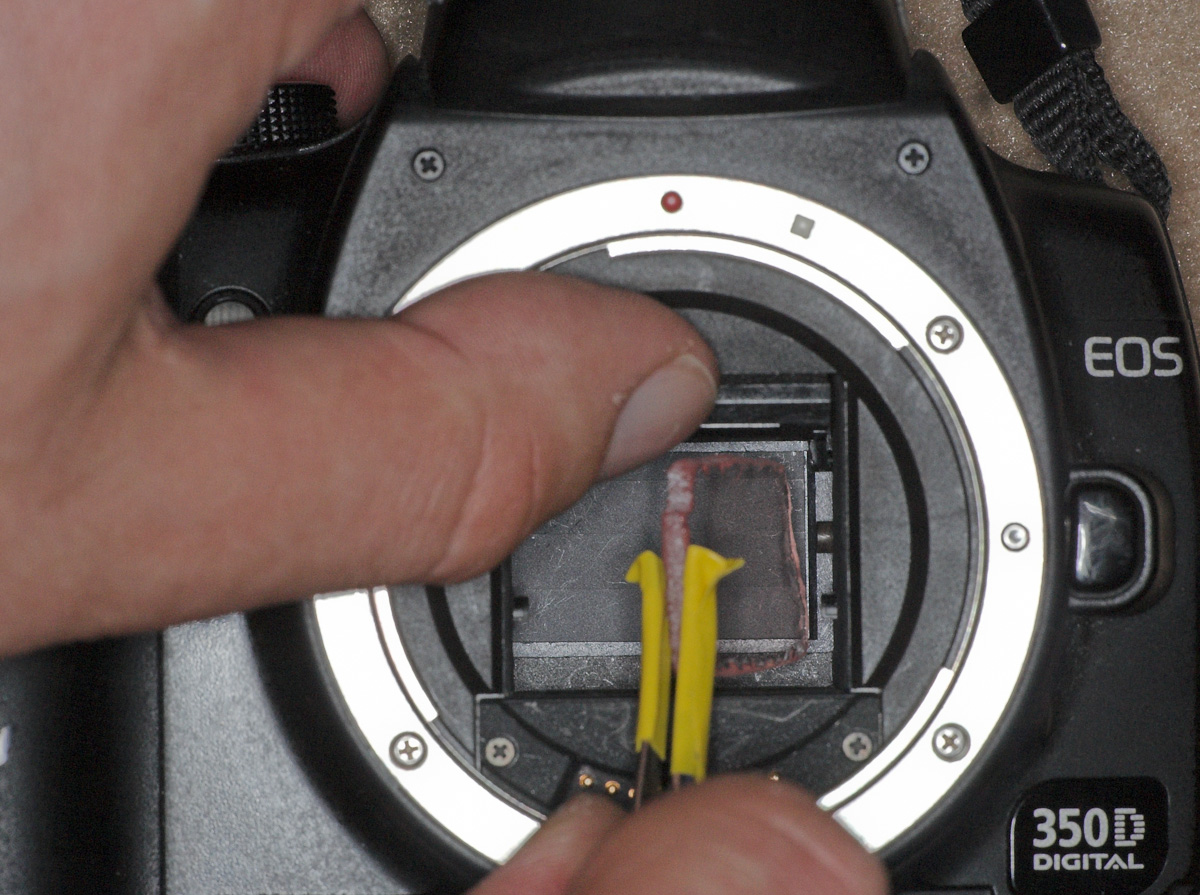
Here an image during the changing of filters:
And here my filter-box with tools:

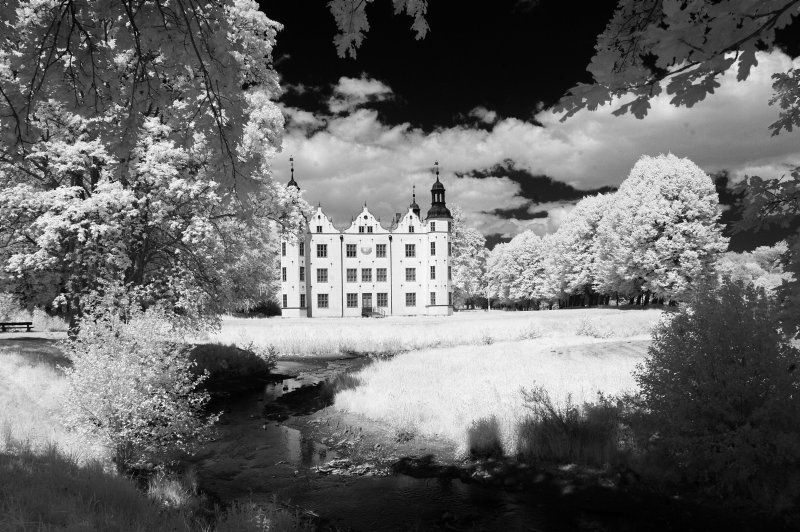
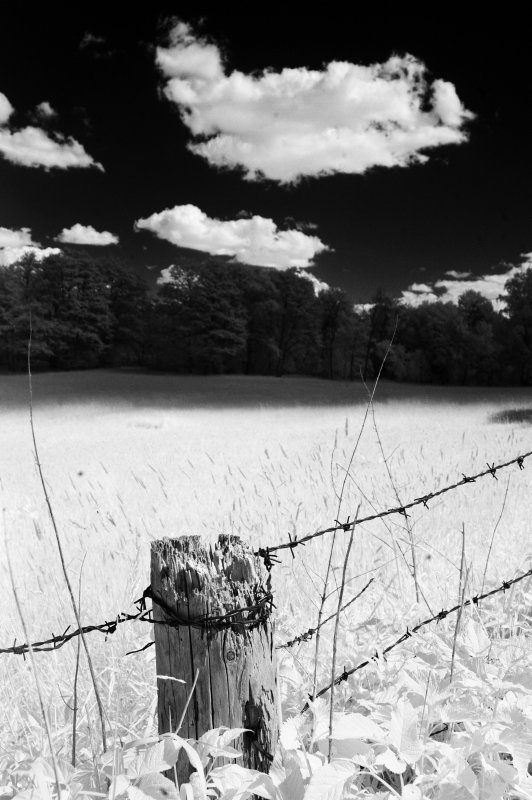
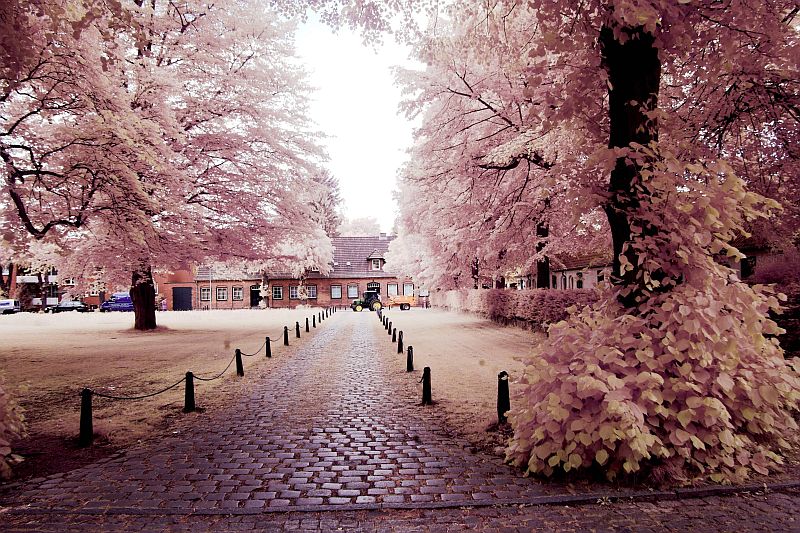
First image results with this kind of modified camera: EOD 350D / Rebel XT with easy exchangeable B&W 093 filter. The images are showing the full EOS 350D image frame - there are no problems with the image-border.
Bellow a picture made with a UV-cut-filter glass inside (instead of the IR-Cut or IR-pass):
I have now tested that camera taking over 1000 pictures: With my kind of work it is not for easy point, shoot and publish work, because there is too much dust in the camera. So I have to remove the visible dust in the pictures afterwards. Probably I have to test it with more cleanliness during the filter changing procedure.
But, normaly I use Photoshop for each picture I want to publish, so that dust removal is not a clear "no go" for me.
Done further tests: After cleaning the sensor, the pictures are nearly dust free. So it is possible to publish pictures without removing the dust from the pictures - I have done so with the first pictures in the IR-gallery.
More pictures on my Ruegen gallery and in my Infrared-Gallery.
As filter examples:
B&W 093: 1, 2, 3, 4, 5, 6
Hoya R72: 1, 2, 3, 4, 5, 6
Canon-Original: 1, 2
UV-cut, visible and IR pass: 1, 2
Rodenstock-Red 29: 1, 2, 3, 4, 5, 6
1000x grey filter: 1, 2
At the moment I am searching for a cheap Canon EOS 5D for the same modification.
Please visit my own DIY work site!